

Most people have heard of Microsoft. But have you heard about its cloud hosting services? With coverage across 54 regions and 120,000 new customers per month, it’s one of the big players.
If you’ve decided to give it a try, this article will take you through the entire process to connect a domain and install WordPress.
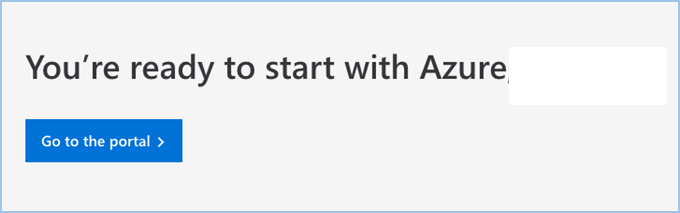
Step One: Log Into Your Portal
After you’ve created your WordPress website, you need to log into your portal. To do so, visit the link in your welcome email and then select Login to Portal on the page you’re directed to.
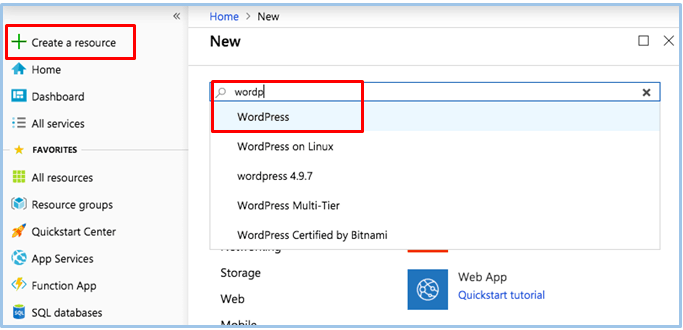
Step Two: Create a Resource
Once you’re logged into the portal, select Create a Resource. In the search bar, enter “WordPress,” and select it when it populates.
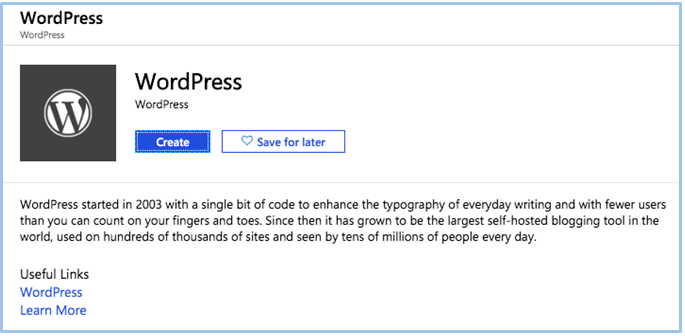
On the next screen, hit Create.
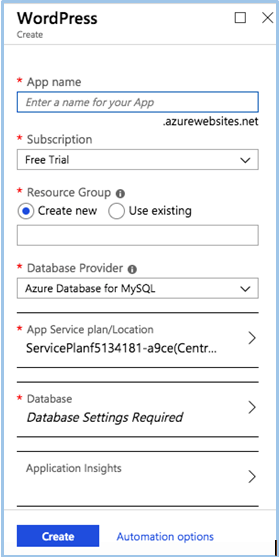
Step Three: Enter the App Details
Once you’ve selected Create, you will need to enter some basic information for your app, e.g., app name, resource group, database provider, and so on. Unless you’re a pro, I’d highly recommend entering the required app name and password, then leaving all the other fields at the default settings.
Click Create once complete and wait for the app to be deployed—it takes a few minutes.
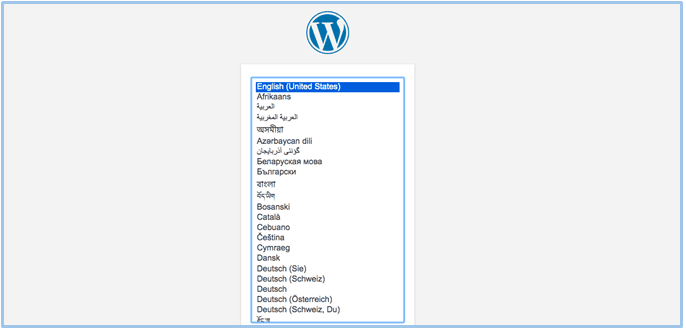
Step Four: Complete the WordPress Configuration
You can check to see if your WordPress website has been successfully set up by visiting:
If it has, you’ll see the standard WordPress screen asking you to complete the setup configuration. You’ll need to enter your location, a site name, a username, and a password. Make a note of these details as you’ll need them to log into your admin.
Step Five: Connect Your Domain
To connect a domain to your WordPress website, follow these steps (it’s a lot, but it really is easy):
- Log into Microsoft Azure portal.
- Select All Services from the left-hand menu.
- Select App Services from the bottom right of the screen.
- Click into the app you’d like to connect with the domain.
- Scroll down and select Custom Domains.
- Select Add Custom Domain and enter the domain name you would like to connect (this must be a domain you have purchased elsewhere).
- Click Validate two times. This will open a window with the instructions on how to confirm your domain ownership.
- Scroll down to the bottom to the section Domain Ownership. Here you will be able to copy the instructions to create an A record and a TXT record at your domain registrar.
- Select Validate again. If Step 8 is done correctly, you will now see verification that you’ve successfully confirmed your domain ownership.
- Select Add Custom Domain to complete the setup (do not miss this step).
- Visit your domain name to confirm the connection is complete. Please note, it can take up to 48 hours for the Domain Name System (DNS) to propagate.
Step Six: Install a Cloudflare CDN
Microsoft Azure offers a free content delivery network (CDN)—and it’s easy to set up. Follow these instructions:
- Search “CDN” in the top search bar, and select CDN Profiles.
- Select Create a CDN Profile.
- Enter a name for the CDN and select Resource Group (your WordPress website).
- Select Standard Microsoft Pricing.
- Click Create and wait.
Easy When You Know How
Considering this is a premium cloud service aimed at experienced website owners, it’s actually an easy setup (with instructions). Although I can’t see why a beginner would choose Microsoft Azure, they could likely handle this process. What’s more, it only took about ten minutes in total.